Followers

Sunday, November 28, 2010

Thanks for more followers!

I gratefully to you who really kind to decided to be my followers. As beginner of nail polish and nail art lover, i know i still really learning to improve in creating more nail art. And im so appreciate for more followers of my blog (onmynail). Still, i looking forward for any comments, suggestions, critics or anything u want to share here with me. So, please dont hesitate to give any of them because all of those are appreciated. :)

Well, yesterday finally i went again to one of fav mall in Bandung after like 2 years havent been visit there. I was so happy and enjoy every moment of them. And "Red Mango' was one of place i got entered and enjoyed. Then it inspired me to create the nail art i just done.

Here is me and mum at Red Mango :

I picked two colors that dominant at Red Mango. They are red and black. So, here it is :


I was so tired to create the flowers, so i used sticker for flower.

Im not showing the polishes i used this time because no photo taken and the camera i used to take photos being used right now and of course i always cant wait for any longer to update the post :)

Friday, November 26, 2010

Simply Green Flower

Hi , i feel so tired today but i always excited to keep update post here. I had through long day and still have lots of work to do for my visa bussiness. Its so making me nervous but i still doing all task with full of faith.

This time, i used sticker i bought few days ago before i left Bali. I bought many nail accesories such as nail stickers, toe separators, blue unknown brand-polish and gold glitter polish from Eternally.


So, this morning i started to use base coat from Pixy and used 2 coats of green from Eternally as base color. Then, i applied flower sticker on green polish.

Thanks for viewing! :)

Thursday, November 25, 2010

3 Flowers

Feels so long time since the last time i updated the blog. Well, ive got alot of work to do so had very little time to write new post. This time, the manicure is about flower again. I still havent get improve creating flower style yet. Honestly, i was going to make dolls expression but oh it was fail at all lol. I thought it was easy to make till i got no idea how to make the lips of the doll lol.

So, I started with base coat from Pixy, then a coat of Tough Buff from Sally Hansen, then i started make design by toothpick creating flowers. I used black from unknown brand-polish, green from Eternally, red from Pixy, and white from unknown-brand polish.

Here is the picture:


No picture of polish i used because i forgot to take any picture of them :(

Saturday, November 20, 2010

Got Leopard

Inspired  from the nail book i bought last month, i havent tried any design on it yet. So, this time i created one of nail design from the book. And here is the book :

Started with base coat from Pixy, a coat of Gold Brown from Pixy, red from pixy and black unknown-brand polish to create leopards. Then top coat from Pixy.

Hand nails:


This time, i crated design to toenails also :D


Goldie & Brown

This is 2nd design of french manicure. For this one, i truly tried myself to make it :D and i used gold glitter.
Okay, so i started with base and top coat from Sally Hansen, then make a line above of the nail with gold gliiter. Then put top coat from Sally Hansen.


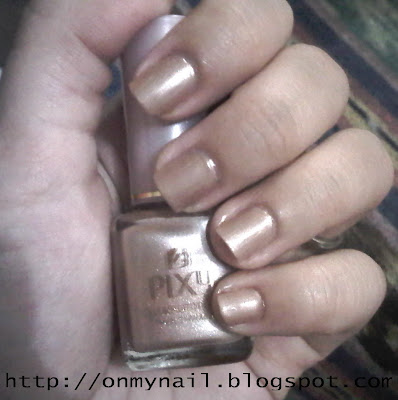
 And for this mani, i used base coat from Pixy, 2 coats of Gold Brown from Pixy and top coat from Pixy. Its just plain polish without any art.


Playful Dots

Hi, im back after had very busy day. This time, i gonna show you about my dots design for nail. For first mani, i started with a base coat from Pixy, then put a line of pink, red, and purple anywhere i want (they placed different of each nail)  and then i put any white dots on the colors. And for last, i used top coat from Pixy.

Put some different colors : red. pink, purple

And then, put some dots on the colors


And for 2nd mani, i started with base coat from Pixy, then make above-line with different color of each nail, then make some black dots and flower. The last i used a top coat from Pixy.
For above-line, colors i used :
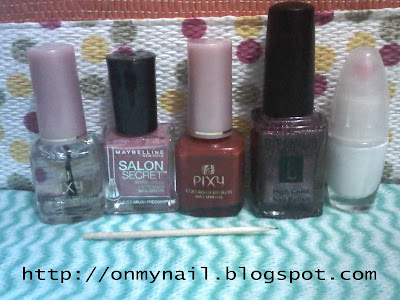
Red - Pixy
Purple - Eternally
Green - Eternally
9 Lady Blossom - Maybelline
Dark Brown - Pixy
For dots and flower, i used black from unknow-brand polish.

Thursday, November 18, 2010

Paint Me Flower

Since flower is easy to make and favourite to almost every women, i made flower to my nails. But like i said, so far this is only style of flower i can make. And i think make some leafs also bit difficult , i dont know why it looks very easy to make, but when i trying to do it by toothpick, its so hard. Well, i never used any nail art pen anyway, but dont know how much would the diffrences between them.

So, for this mani i started with base and top coat from Sally Hansen, a coat of brown gold from Pixy, green for leafs from Eternally, red from Pixy and white unknown brand-polish for small dot in the middle of flower, and last of course a top coat.


Then i started to make more flowers :


For this mani, i started with base coat from Pixy, a coat of purple from Eternally, white fron unknown brand-polish to create the flowers then a top coat from Pixy.


Wednesday, November 17, 2010

Back to Nail

Hello, back here for a while from viewing US Embassy website. I have read and found out what info that i need. Okay back to nail, today im going to updating some photos of mani. I like to paint flowers and french manicure-style. I have done lots of flower mani, but i still have to think for more style of flower to create on nail.

For this, i started with base and top coat from Sally Hansen, then i applied 2 coats of Tough Buff from Sally Hansen, then i paint the flower with tooth pick. I used red from Pixy and green from Eternally to make the flower. Oh yeah, i forgot to mention that i use white from unknown-brand of polish to make a small dot in the middle of flower.
Here the picture :

And this one is mani that my neighbour done to my right hand. Do nail art by using left hand is still very difficult for me! :( So she offered to make a french manicure to my right hand. For this mani , started with base and top coat from Sally Hansen, one coat of Tough Buff that making my nails look more natural and healthy , and white of unknown brand-polish  to make horizontal line on top of nails. Then i asked her if she can apply some green glittter that i bought the day before. And she applied it very tidy. I love the mani result very much :D So here is the picture :

And i forgot to take pics of the gliiter bottle and the polish bottles for this mani.

Tuesday, November 16, 2010

Good Morning!

Good morning guys, been sleeping very good last night. I have couple nail art pictures i done before i started this blog. Im going to show you all of them. As a beginner become nail polish lover, i still need any lessons or suggestions about nailing rules. Im not sure what u call them " nailing" or whatever. The mostly problem i got is when i paint my nails, it get messy to edge of nail's skin (left and right side of the nail skin). But now i can pretty handle it. So i need your comments, suggestions or anything, you guys free to speak up on here.

For this manicure, I used base and top coat from Sally Hansen, red colour (Pixy ~ its Indo brand of nail polish), glitter purple from Eternally and green from Eternally. I used toothppick to create this mani. 


For this mani, i used base and top coat from Sally Hansen, two coats of red (Pixy), green from Eternally. brown gold from Pixy and white from unknow brand. I think this is a fail mani i done. And i dont know how did i do different colour of one nail lol.  


For this mani , i name it "Little Cherries on the Pink", i used base and top coat from Sally Hansen, 9 Lady Blossom from Maybelline, red from Pixy, green from Eternally and white for small dots on cherry from unknown brand. 


9 Lady Blossom

A few weeks ago, i went to supermarket in the mall to get my monthly needs. I didnt shop alot , still needs lots of cost for my visa bussiness to US. So i tried my best not to spend so much money. But still couldnt control myself of not buying at least 1 nail polish :D. So i found a gorgeous nail polish from Maybelline. Its colour name is 9 Lady Blossom. But it was too bad because they only sell 1 color. Weird.

So for this nail polish, i didnt make art at all. I wanted to look how good this color without any art except some stickers.
I applied base coat from Sally  Hansen, then i applied 2 coats of 9 Lady Blossom (Maybelline), then last i put top coat from Sally Hansen.


First Posting!

Hi everyone. Finally i decided to create my own blog about nail polish. Im so glad as first time to posting here. I hope you enjoy reading my blog. I have become a nail polish addict since i stopped a bad habbit of biting my nails. Now i cant through any day without nailing. Its so much fun and really helps me to spend time real quick especially when you got nothing to do in a day!

Okay so this is first nail polish i ever bought since i fallen deeply in love with nail polish. The color is very soft from Sally Hansen : Tough Buff. I applied like 3-4 coats. It took me 15 mins for the 2nd coat to let them dry then i wait for 20 mins at 3rd coat and wait 30 mins at least for the last coat to let them dry.

The light wasnt so perfect, i need real camera digital soon!