Followers

Showing posts with label diy. Show all posts

Friday, January 31, 2014

DIY : Nail Polish & Perfumes Display Stand

Hello guys.

Another DIY again. This one is so easy, pretty and affordable! I love affordable things. Well this one inspired by so many beauty youtubers and i am pretty sure you might already pretty familiar with this project.

So i used to love collecting nail polishes in the past and had all them stored in one container. That wasn't working that well for me. First of all, it was quite heavy and you have to open the lid up to see all colors i have. Until one day i found this great idea on youtube to make nail polish & perfumes display stand. I am so in love because it looks pretty and very neat looking.


Things you gonna need : 
Im sorry there is always something i forgot to include in the picture.. :/ 

I got 2 plastic tray with different size and 2 candle holders from dollar tree. So, obviously they are $1 each. Oh yes i know what a steal! 

So to start :
1. Grab one of candle holders, go ahead glue the top part of it.
2. Place the bigger tray on, wait until the glue dry and cooling down. 
3. Grab the 2nd candle holder, place it in the center of the bigger tray with the glue gun 
4. Glue the top of the 2nd candle holder, and place the last tray which suppose to be the smaller tray. 
5. You are done!


There you have it, all you gotta do now fill in this pretty stand with your colorful stuff! Or even jeweleries! I think it would look so cute too. 


So let me know if you have made this kind of diy! Thank you for checking this post out! Have a wonderful day :)


Wednesday, January 29, 2014

DIY : Custom Drawers Divider (Makeup Storage)

Hello guys.

Im coming tonight to share one of my diys that i just recently made. One of my fellow Indonesian Beauty Blogger, Rosdiana suggested me to make a blogpost about this diy! Thanks for the idea ;) . Anyway, It's the custom drawers divider for makeup storage (at least to me), but you absolutely can use it for other things.

And of course i wanna mention this diy absolutely wasnt invented by me but this inspired by a diy/beauty/travel youtuber called "pinksofoxy". Her name is Christine and i absolutely love her videos. You definitely should check her out if you're a youtube lover like i am.


For this diy project you are gonna need :
i forgot to take picture before i started, so thats why the fabric is very small because it's leftover piece after the project made. 

1. Fabric (im using black, you can use whatever color you desire)
2. Glue gun and the glue stick
3. Random boxes that you dont use it anymore
4. Fabric glue (optional)
5. Utility knife

So first you want to measure the size of your drawer. You gonna find out how wide and how length it is. The measurements of the picture is what my drawer needs.


After you find out, lay flat your box , draw many rectangle pieces. Like the illustration picture above, i drew 12 rectangle pieces vary in sizes. All the measurements in the picture is what my drawers size. Of course your drawer size might be different with mine so go ahead use the right measurement for your own drawer :) 

After draw all the pieces, cut them out. I used utility knife , i find its the best tool to handle the hard tough boxes. Then place your fabric over the each pieces, glued them on with fabric glue. I personally used glue gun because thats all i have. If you are using glue gun, be careful girls it's stinking hot, i hurt my skin many timeees!

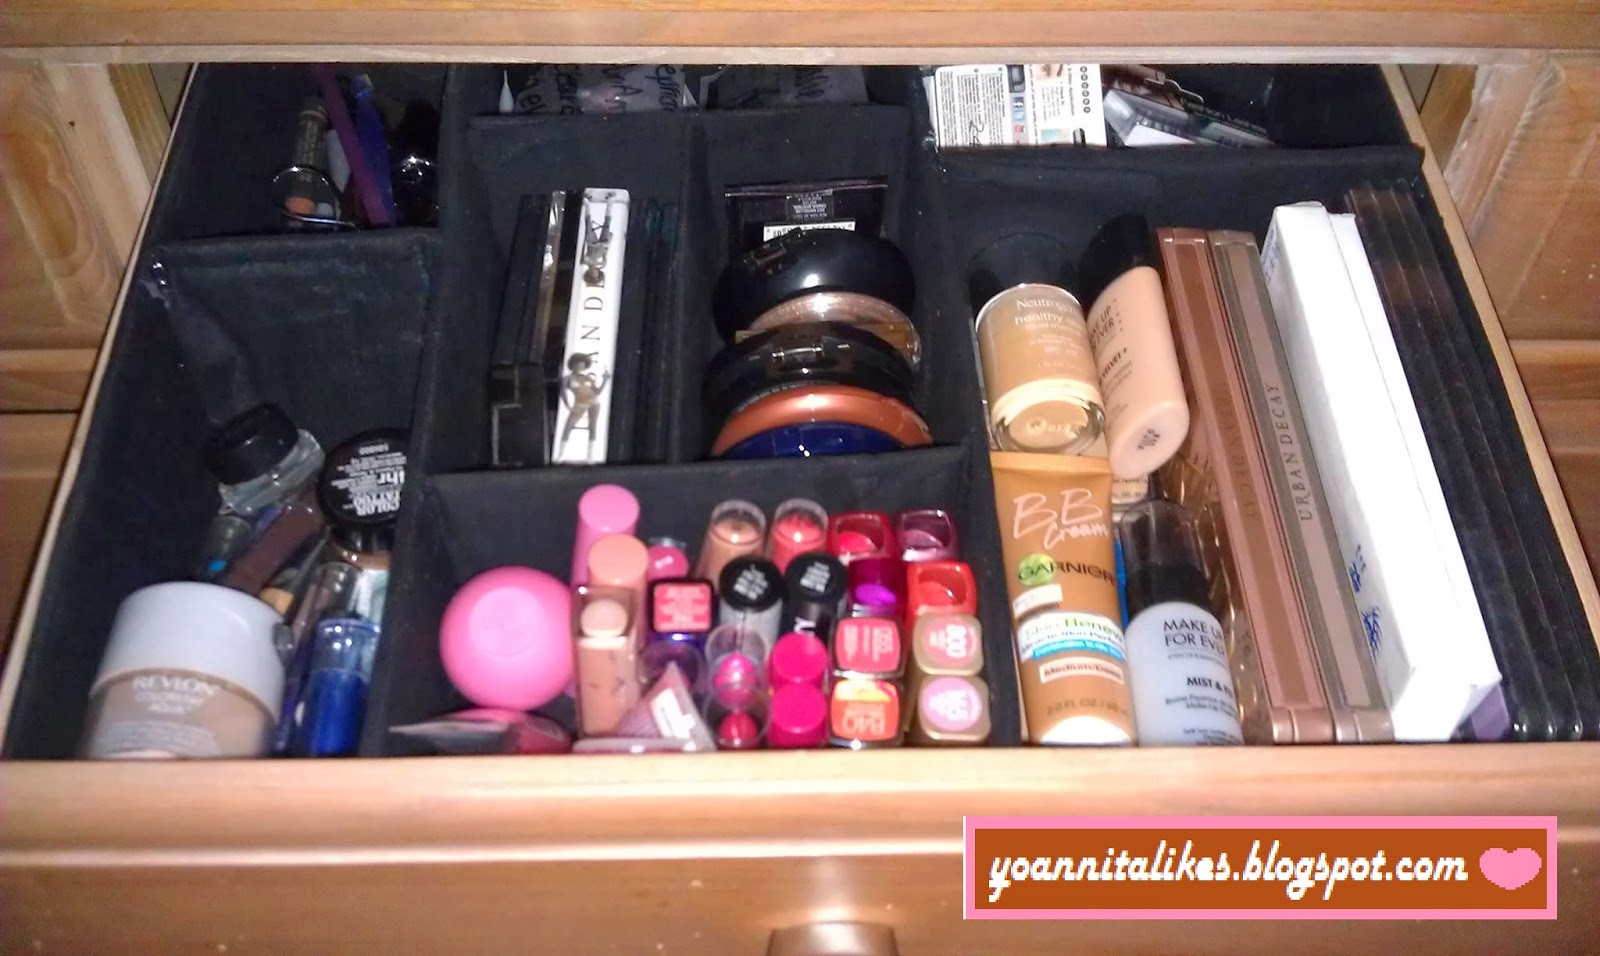
After all box pieces covered up with fabric, then you start making the tray with 4 sides (front, behind, left, and right) and then the remaining pieces that will be placed as the divider. Again, im using the hot glue gun to connect every pieces. Let them dry for 30 minutes then place it right away in your drawer. It's time to put all the makeup stuff in. This is the most fun part amongst all.

Tadaaa!!

there is no way i could rotate the picture. I did rotate it before i upload but the blogger keep the actual picture :/ 


I fell in love the way it look in my drawer. No more makeup items laying around randomly anymore on my dressing table. I hope my explanations and illustration pictures is clear enough to understand by you all. Well let me know what you guys think about this diy, and if you recreate this, please let me know the link of your pictures because i'd love to see it. 

Thanks for checking out this post, dont forget to comment! :)


Tuesday, November 13, 2012

DIY : Tree Transformation!


Does anyone excited for christmas already? I am! I know some of you guys probably gonna say : oh calm down, this is only november seriously! Hmm i know, im excited for christmas too early and cant help myself lol.

Okay do you guys remember the post with title My 1st Photoshoot / Make-up "Marissa Cornell" ? When we were doing photoshoot , i happened to find a small falling down tree and got an idea to transform it as my christmas tree to be placed in my bedroom. Then i carried that tree all our way back to the school apartment.


Feeling so happy that night, photoshoots done, got free tree, i was thinking alot how im gonna work on this tree. Around 1 week later, i went to dollar tree to get all the stuff i need. I spent around $15 in total.

As always, i planned to get the pictures of all items i bought but then i forgot because i was too excited to start the project lol. Instead i will just mention them : multicolored christmas lights , multicolored ornament balls, red tinsel garlands, red ribbon, decorative bows.

When i started my work, it was such a PAIN to eliminate those branches as much as i could. Having too many branches meaning alot of work for me to wrapping with the ribbon. Then i started to wrapping the tinsel garlands from the bottom all the way up and change with ribbon to wrap the small branches. I used glue gun here to make them tightly wrapped against the tree. And there is most enjoyable part : start decorating! I put some ornament balls here and there..


Then all of sudden i thought why dont i hang some pictures on it ?


And finally done..... with very cute bows and lights! :)


This might be a very different christmas tree ever but it works for me. And this is how i usually sleep at night with :


Do you like DIY project? Have you done it lately? If so, what was it? :)

Thanks for checking this post out!